Best VPS for Telegram Bots (2025) — Deployment Guide
Telegram bots require a server that runs 24/7. For API backends, see Deploy FastAPI on VPS to receive and respond to messages. A VPS provides 24/7 uptime and a stable IP. For Docker deployment, see VPS for Docker, and full control needed for reliable bot operation. This guide covers choosing the right VPS. For EU hosting, consider Poland VPS or Netherlands VPS written in Python and Node.js, configuring webhooks with SSL, managing processes with PM2, monitoring bot health, and scaling for high-traffic deployments.
Why a VPS Is Essential for Telegram Bots
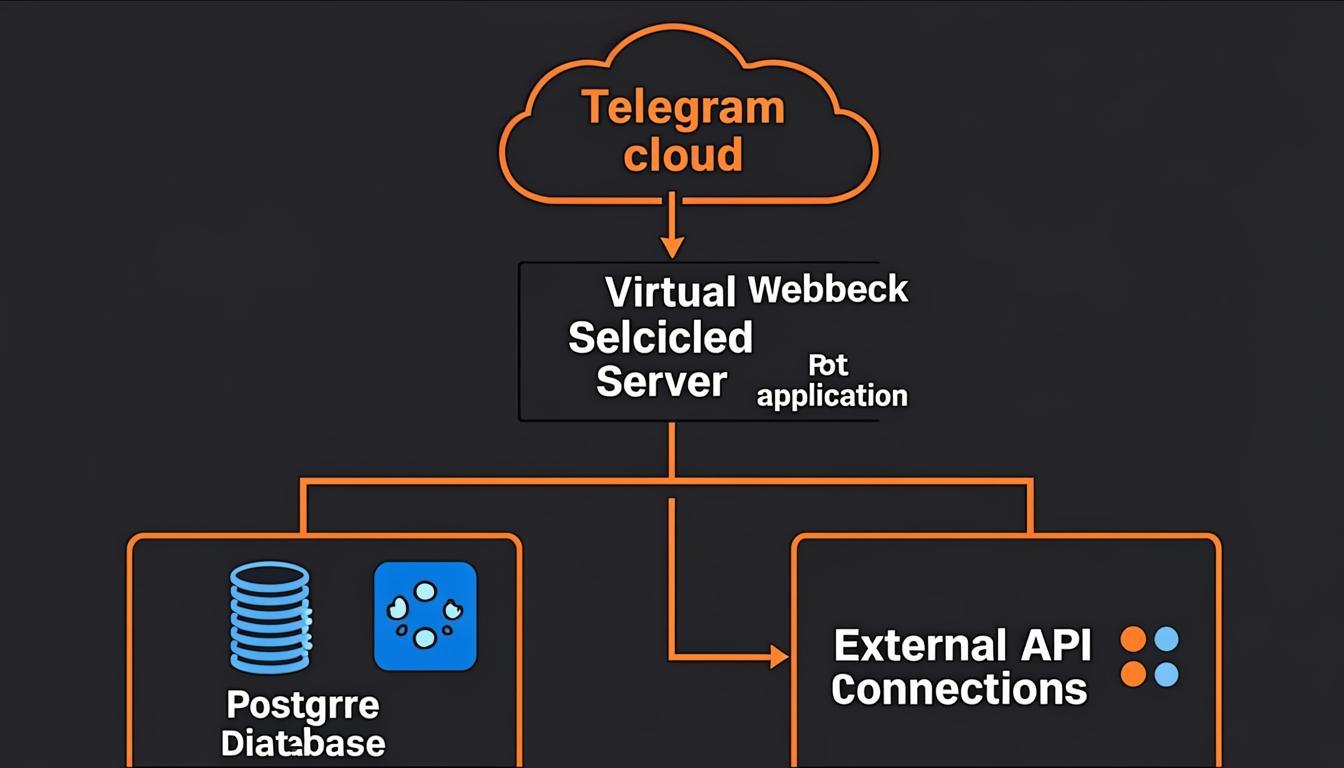
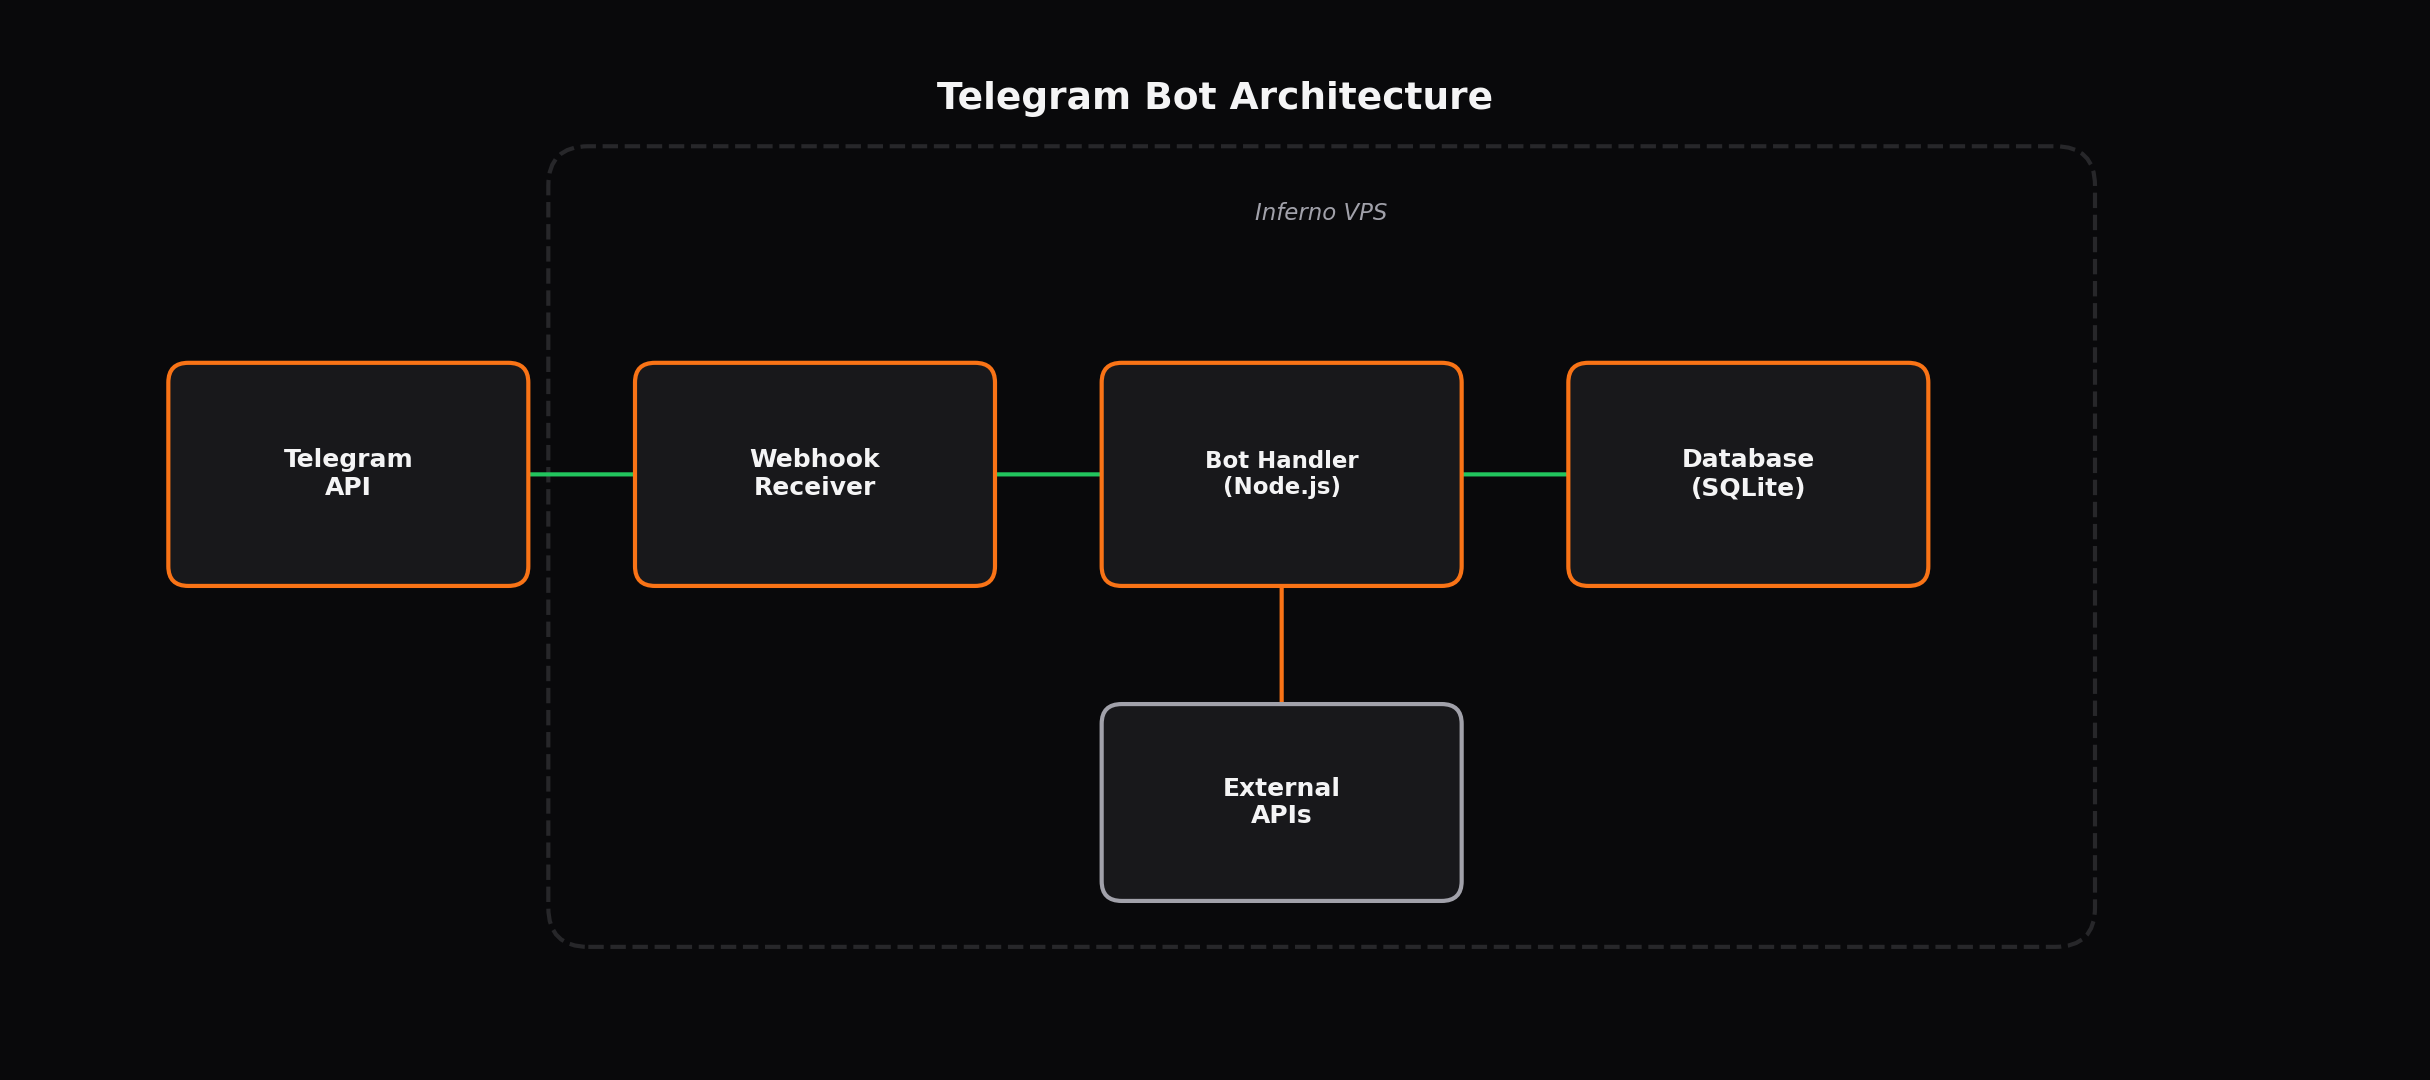
Telegram bots communicate with users through two methods: long polling and webhooks. Long polling sends repeated requests to the Telegram API to check for new messages. Webhooks receive push notifications from Telegram servers whenever a message arrives. Both methods require a server that runs continuously, making a VPS the natural hosting choice.
24/7 availability
Your desktop computer or laptop cannot run a bot reliably. Sleep mode, network interruptions, system updates, and power outages all cause downtime. A VPS runs in a data center with redundant power, network connections, and physical security. Your bot stays online regardless of what happens with your local machine. Telegram users expect immediate responses — a bot that goes offline for hours loses user trust and engagement.
Stable IP address for webhooks
Telegram webhook configuration requires a publicly accessible URL with a valid SSL certificate. Residential internet connections typically have dynamic IP addresses that change periodically, breaking webhook configurations. A VPS provides a static IP address that remains constant for the lifetime of your server. Combined with a domain name, this gives you a permanent HTTPS endpoint for webhook delivery.
Low latency
VPS providers host servers in data centers with high-bandwidth connections to major internet exchange points. Your bot receives webhook deliveries from Telegram within milliseconds and sends responses just as quickly. Users experience near-instant bot responses regardless of their geographic location, assuming your VPS is in a reasonably central location.
Scalability
Start with a minimal VPS for a single bot. As your bot grows in user count and functionality, upgrade the VPS plan or deploy additional bots on the same server. Unlike PaaS platforms that charge per execution or per dyno, a VPS gives you a fixed resource pool to allocate however you choose. Run multiple bots, databases, and background services on the same server without per-unit charges.
VPS Requirements for Telegram Bots
Telegram bots are lightweight applications. Most bots consist of an HTTP server (for webhooks) or a polling loop, some business logic, and optionally a database connection. The resource requirements are minimal compared to web applications, databases, or AI workloads.
| Bot Type | vCPUs | RAM | Storage | Use Case |
|---|---|---|---|---|
| Simple command bot | 1 | 512 MB | 10 GB SSD | Echo bots, command handlers, basic inline bots |
| Feature bot with database | 1 | 1 GB | 15 GB SSD | Weather bots, reminder bots, user registration systems |
| Multi-bot server | 2 | 2 GB | 25 GB SSD | Running 5-15 bots simultaneously with SQLite/PostgreSQL |
| High-traffic bot | 2 | 4 GB | 40 GB SSD | 1000+ daily active users, media processing, heavy database queries |
| Bot + web dashboard | 2 | 4 GB | 50 GB SSD | Bot with admin panel, analytics dashboard, background workers |
Python Telegram Bot: Complete Deployment
This section deploys a production-ready Telegram bot using the python-telegram-bot library with webhook configuration.
Step 1: Server preparation
# Update system
sudo apt update && sudo apt upgrade -y

# Install Python 3.11 and pip
sudo apt install -y python3.11 python3.11-venv python3-pip python3-dev \
    build-essential libssl-dev

# Install Nginx and Certbot
sudo apt install -y nginx certbot python3-certbot-nginx

# Install PM2 for process management
sudo npm install -g pm2

# Create bot directory
mkdir -p ~/telegram-bots/mybot && cd ~/telegram-bots/mybot

# Create virtual environment
python3.11 -m venv venv
source venv/bin/activate
Step 2: Install dependencies
# Create requirements.txt
cat > requirements.txt << 'EOF'
python-telegram-bot==21.3
aiohttp==3.9.5
uvicorn==0.29.0
python-dotenv==1.0.1
SQLAlchemy==2.0.30
aiosqlite==0.20.0
EOF

# Install dependencies
pip install -r requirements.txt
Step 3: Create the bot application
cat > bot.py << 'EOF'
import logging
import os
from dotenv import load_dotenv
from telegram import Update
from telegram.ext import Application, CommandHandler, MessageHandler, filters, ContextTypes

load_dotenv()

BOT_TOKEN = os.environ.get("BOT_TOKEN")
WEBHOOK_URL = os.environ.get("WEBHOOK_URL")
PORT = int(os.environ.get("PORT", 8443))

logging.basicConfig(
    format="%(asctime)s - %(name)s - %(levelname)s - %(message)s",
    level=logging.INFO
)
logger = logging.getLogger(__name__)

async def start(update: Update, context: ContextTypes.DEFAULT_TYPE) -> None:
    await update.message.reply_text(
        "Welcome! I am a production Telegram bot.\n\n"
        "Available commands:\n"
        "/start - Show this message\n"
        "/help - Display help information\n"
        "/status - Check bot status"
    )

async def help_command(update: Update, context: ContextTypes.DEFAULT_TYPE) -> None:
    await update.message.reply_text(
        "This bot demonstrates a production deployment setup.\n"
        "It uses webhooks, SSL, and PM2 process management."
    )

async def status(update: Update, context: ContextTypes.DEFAULT_TYPE) -> None:
    import psutil
    cpu = psutil.cpu_percent()
    memory = psutil.virtual_memory().percent
    await update.message.reply_text(
        f"Bot Status:\n"
        f"CPU Usage: {cpu}%\n"
        f"Memory Usage: {memory}%\n"
        f"Status: Operational"
    )

async def echo(update: Update, context: ContextTypes.DEFAULT_TYPE) -> None:
    await update.message.reply_text(f"You said: {update.message.text}")

async def error_handler(update: object, context: ContextTypes.DEFAULT_TYPE) -> None:
    logger.error(f"Exception: {context.error}", exc_info=context.error)

def main() -> None:
    application = Application.builder().token(BOT_TOKEN).build()

    application.add_handler(CommandHandler("start", start))
    application.add_handler(CommandHandler("help", help_command))
    application.add_handler(CommandHandler("status", status))
    application.add_handler(MessageHandler(filters.TEXT & ~filters.COMMAND, echo))
    application.add_error_handler(error_handler)

    application.run_webhook(
        listen="0.0.0.0",
        port=PORT,
        url_path=BOT_TOKEN,
        webhook_url=f"{WEBHOOK_URL}/{BOT_TOKEN}",
        drop_pending_updates=True,
    )
    logger.info(f"Bot started with webhook: {WEBHOOK_URL}/{BOT_TOKEN}")

if __name__ == "__main__":
    main()
EOF

# Install psutil for status command
pip install psutil
Step 4: Create environment configuration
# Create .env file
cat > .env << 'EOF'
BOT_TOKEN=your_telegram_bot_token_here
WEBHOOK_URL=https://bots.yourdomain.com
PORT=8443
EOF

# Secure the environment file
chmod 600 .env

# Get your bot token from @BotFather on Telegram
# Create a new bot with /newbot and copy the token
Step 5: Configure Nginx and SSL
# Create Nginx configuration
sudo tee /etc/nginx/sites-available/telegram-bot << 'EOF'
server {
    listen 80;
    server_name bots.yourdomain.com;

    location / {
        proxy_pass http://127.0.0.1:8443;
        proxy_http_version 1.1;
        proxy_set_header Host $host;
        proxy_set_header X-Real-IP $remote_addr;
        proxy_set_header X-Forwarded-For $proxy_add_x_forwarded_for;
        proxy_set_header X-Forwarded-Proto $scheme;
        proxy_connect_timeout 60s;
        proxy_send_timeout 60s;
        proxy_read_timeout 60s;
    }
}
EOF

# Enable the site
sudo ln -s /etc/nginx/sites-available/telegram-bot /etc/nginx/sites-enabled/
sudo nginx -t
sudo systemctl reload nginx

# Obtain SSL certificate
sudo certbot --nginx -d bots.yourdomain.com --non-interactive \
    --agree-tos -m your@email.com
Step 6: Start with PM2
# Create PM2 ecosystem configuration
cat > ecosystem.config.js << 'EOF'
module.exports = {
  apps: [{
    name: "mybot",
    script: "bot.py",
    interpreter: "/home/$USER/telegram-bots/mybot/venv/bin/python",
    cwd: "/home/$USER/telegram-bots/mybot",
    env_file: ".env",
    instances: 1,
    autorestart: true,
    max_memory_restart: "200M",
    error_file: "/home/$USER/telegram-bots/mybot/logs/error.log",
    out_file: "/home/$USER/telegram-bots/mybot/logs/out.log",
    log_date_format: "YYYY-MM-DD HH:mm:ss Z",
    merge_logs: true,
  }]
};
EOF

# Create logs directory
mkdir -p ~/telegram-bots/mybot/logs

# Replace $USER in ecosystem file
sed -i "s/\$USER/$USER/g" ecosystem.config.js

# Start the bot
pm2 start ecosystem.config.js

# Save PM2 configuration for auto-start on reboot
pm2 save
pm2 startup

# Check bot status
pm2 status

# View live logs
pm2 logs mybot
Node.js Telegram Bot: Complete Deployment
This section deploys a Telegram bot using the Telegraf framework with Node.js.
Step 1: Install Node.js and initialize project
# Install Node.js 20 LTS via NodeSource
curl -fsSL https://deb.nodesource.com/setup_20.x | sudo -E bash -
sudo apt install -y nodejs

# Verify installation
node --version
npm --version

# Create project directory
mkdir -p ~/telegram-bots/nodebot && cd ~/telegram-bots/nodebot

# Initialize project
npm init -y

# Install dependencies
npm install telegraf dotenv express
Step 2: Create the bot application
cat > bot.js << 'EOF'
require('dotenv').config();
const { Telegraf } = require('telegraf');
const express = require('express');

const BOT_TOKEN = process.env.BOT_TOKEN;
const PORT = process.env.PORT || 3000;
const WEBHOOK_URL = process.env.WEBHOOK_URL;

const bot = new Telegraf(BOT_TOKEN);

// Command handlers
bot.start((ctx) => {
    ctx.reply(
        "Welcome! I am a Node.js Telegram bot.\n\n" +
        "Commands:\n" +
        "/start - Welcome message\n" +
        "/help - Help information\n" +
        "/ping - Check response time"
    );
});

bot.help((ctx) => {
    ctx.reply("This bot runs on Telegraf with webhooks, Express, and PM2.");
});

bot.command('ping', async (ctx) => {
    const start = Date.now();
    await ctx.reply("Calculating...");
    const latency = Date.now() - start;
    ctx.reply(`Response latency: ${latency}ms`);
});

// Text message handler
bot.on('text', (ctx) => {
    ctx.reply(`You said: ${ctx.message.text}`);
});

// Error handling
bot.catch((err, ctx) => {
    console.error(`Error for ${ctx.updateType}:`, err);
});

// Express server for webhook
const app = express();
app.use(express.json());

app.get('/health', (req, res) => {
    res.json({ status: 'ok', uptime: process.uptime() });
});

// Start webhook mode
if (WEBHOOK_URL) {
    app.use(bot.webhookCallback(`/webhook/${BOT_TOKEN}`));
    bot.telegram.setWebhook(`${WEBHOOK_URL}/webhook/${BOT_TOKEN}`)
        .then(() => {
            console.log(`Webhook set: ${WEBHOOK_URL}/webhook/${BOT_TOKEN}`);
            app.listen(PORT, () => {
                console.log(`Server listening on port ${PORT}`);
            });
        })
        .catch(console.error);
} else {
    bot.launch().then(() => {
        console.log('Bot started in polling mode');
    });
}

// Graceful shutdown
process.once('SIGINT', () => bot.stop('SIGINT'));
process.once('SIGTERM', () => bot.stop('SIGTERM'));
EOF
Step 3: Configure and start
# Create .env file
cat > .env << 'EOF'
BOT_TOKEN=your_telegram_bot_token_here
WEBHOOK_URL=https://bots.yourdomain.com
PORT=3000
EOF
chmod 600 .env

# Create PM2 configuration
cat > ecosystem.config.js << 'EOF'
module.exports = {
  apps: [{
    name: "nodebot",
    script: "bot.js",
    instances: 1,
    autorestart: true,
    max_memory_restart: "150M",
    env: {
      NODE_ENV: "production"
    },
    error_file: "./logs/error.log",
    out_file: "./logs/out.log",
    log_date_format: "YYYY-MM-DD HH:mm:ss Z",
  }]
};
EOF

mkdir -p logs

# Update Nginx to proxy to port 3000 for the Node.js bot
sudo tee /etc/nginx/sites-available/telegram-bot << 'EOF'
server {
    listen 80;
    server_name bots.yourdomain.com;

    # Python bot
    location /7123456789:AAH_bot_token_1/ {
        proxy_pass http://127.0.0.1:8443;
        proxy_http_version 1.1;
        proxy_set_header Host $host;
        proxy_set_header X-Real-IP $remote_addr;
        proxy_set_header X-Forwarded-For $proxy_add_x_forwarded_for;
        proxy_set_header X-Forwarded-Proto $scheme;
    }

    # Node.js bot
    location /7123456789:BBH_bot_token_2/ {
        proxy_pass http://127.0.0.1:3000;
        proxy_http_version 1.1;
        proxy_set_header Host $host;
        proxy_set_header X-Real-IP $remote_addr;
        proxy_set_header X-Forwarded-For $proxy_add_x_forwarded_for;
        proxy_set_header X-Forwarded-Proto $scheme;
    }
}
EOF

sudo nginx -t && sudo systemctl reload nginx

# Start the Node.js bot
pm2 start ecosystem.config.js
pm2 save
Webhook vs Long Polling: Which to Choose
| Feature | Webhook | Long Polling |
|---|---|---|
| Response speed | Instant (push notification) | 1-3 second delay (polling interval) |
| Server load | Low (only receives requests) | Higher (continuous polling requests) |
| Requirements | Public HTTPS URL, SSL certificate | Outbound internet access only |
| Setup complexity | Medium (Nginx + SSL + domain) | Low (just run the bot) |
| Reliability | High (Telegram pushes to you) | Medium (can miss updates during network issues) |
| Scalability | Better for high traffic | Suitable for low-traffic bots |
| Behind NAT/CGN | Not possible | Works fine |
Use webhooks for all production bots. The instant response time, lower server load, and better reliability make webhooks the superior choice. Long polling is acceptable for development, testing, or bots running in restricted network environments where you cannot receive inbound connections.
PM2 Process Manager: Complete Configuration
PM2 keeps your bots running, automatically restarts them after crashes, and manages log files. It is the standard process manager for Node.js applications and works equally well for Python bots.
# Common PM2 commands
pm2 list                    # List all running processes
pm2 logs                    # View all logs
pm2 logs mybot              # View logs for specific bot
pm2 restart mybot           # Restart a bot
pm2 stop mybot              # Stop a bot
pm2 delete mybot            # Remove a bot from PM2
pm2 monit                   # Real-time monitoring dashboard

# Auto-restart on server reboot
pm2 startup                 # Generate startup script
pm2 save                    # Save current process list

# Resource monitoring
pm2 show mybot              # Detailed process info
pm2 describe mybot          # Metadata and environment

# Log management
pm2 flush                   # Clear all logs
pm2 install pm2-logrotate   # Auto-rotate logs when they exceed size

# Cluster mode (for high-traffic bots, requires stateless design)
pm2 start bot.js -i max     # Use all available CPU cores
pm2 start bot.js -i 2       # Use exactly 2 instances
Database Integration for Telegram Bots
# SQLite setup (simplest option, built into Python)
# In your bot code:
import sqlite3

conn = sqlite3.connect('bot_database.db')
cursor = conn.cursor()
cursor.execute('''
    CREATE TABLE IF NOT EXISTS users (
        user_id INTEGER PRIMARY KEY,
        username TEXT,
        first_name TEXT,
        joined_at TIMESTAMP DEFAULT CURRENT_TIMESTAMP
    )
''')
conn.commit()

# PostgreSQL setup (for production, multiple bots)
sudo apt install -y postgresql postgresql-contrib
sudo -u postgres psql -c "CREATE DATABASE telegram_bots;"
sudo -u postgres psql -c "CREATE USER botuser WITH PASSWORD 'secure_password';"
sudo -u postgres psql -c "GRANT ALL PRIVILEGES ON DATABASE telegram_bots TO botuser;"

# Add to Python requirements.txt:
# asyncpg==0.29.0
# SQLAlchemy==2.0.30

# Connection string format:
# DATABASE_URL=postgresql://botuser:secure_password@localhost:5432/telegram_bots
Monitoring and Alerting
# Create a health check script for all bots
cat > ~/telegram-bots/healthcheck.sh << 'EOF'
#!/bin/bash
# Health check for Telegram bots
ALERT_EMAIL="your@email.com"
LOG="/var/log/bot-healthcheck.log"

check_bot() {
    local bot_name=$1
    local status=$(pm2 pid $bot_name 2>/dev/null)
    if [ -z "$status" ]; then
        echo "$(date): $bot_name is DOWN. Restarting..." >> $LOG
        pm2 restart $bot_name
    fi
}

check_bot mybot
check_bot nodebot

# Check if PM2 itself is running
if ! pgrep -x "PM2" > /dev/null; then
    echo "$(date): PM2 is not running. Starting..." >> $LOG
    pm2 resurrect
fi

# Check disk space
DISK_USAGE=$(df / | tail -1 | awk '{print $5}' | tr -d '%')
if [ "$DISK_USAGE" -gt 90 ]; then
    echo "$(date): Disk usage at ${DISK_USAGE}%" >> $LOG
fi
EOF
chmod +x ~/telegram-bots/healthcheck.sh

# Run every 2 minutes
(crontab -l 2>/dev/null; echo "*/2 * * * * ~/telegram-bots/healthcheck.sh") | crontab -
Scaling for High-Traffic Bots
A single bot instance can handle approximately 30-50 messages per second depending on the complexity of your handler logic and database queries. If your bot serves thousands of concurrent users, consider these scaling strategies.
Horizontal scaling with PM2 cluster mode
Run multiple instances of your bot behind a load balancer. PM2 cluster mode distributes incoming webhook requests across instances. This requires your bot to be stateless (no in-memory state that is specific to an instance).
# Run 4 instances of the bot
pm2 start bot.js -i 4 --name "mybot-cluster"

# PM2 automatically distributes webhook requests across instances
Message queue for heavy processing
For bots that perform CPU-intensive operations (image processing, AI inference, data analysis), offload work to a background queue. Redis with BullMQ (Node.js) or Celery (Python) provides a reliable message queue that decouples webhook handling from processing.
Pricing Comparison: VPS vs PaaS for Telegram Bots
| Provider | Price | Specs | Bots Supported | Limitations |
|---|---|---|---|---|
| Inferno VPS | $6/mo | 1 vCPU, 1 GB, 20 GB NVMe | 3-5 bots | Requires setup, full control |
| Inferno VPS | $8/mo | 2 vCPU, 2 GB, 40 GB NVMe | 10-15 bots | Best value for multiple bots |
| Railway | $5/mo | 512 MB RAM, 500 hrs | 1-2 bots | Usage-based billing, execution limits |
| Heroku | $7/mo (Eco) | 512 MB RAM | 1 bot | Dynos sleep after inactivity, webhooks break |
| Render | $7/mo | 512 MB RAM | 1 bot | Spins down after inactivity (free tier), unreliable for webhooks |
| Fly.io | $3-5/mo | 256 MB shared CPU | 1-2 bots | Complex pricing, bandwidth charges, limited memory |
Security Best Practices
# Configure UFW firewall
sudo ufw default deny incoming
sudo ufw default allow outgoing
sudo ufw allow 22/tcp     # SSH
sudo ufw allow 80/tcp     # HTTP (for certbot)
sudo ufw allow 443/tcp    # HTTPS
sudo ufw enable

# Never expose bot ports directly
# Bot should only be accessible through Nginx on 443

# Disable root SSH login
sudo sed -i 's/#PermitRootLogin.*/PermitRootLogin no/' /etc/ssh/sshd_config
sudo systemctl restart sshd

# Use SSH key authentication only
sudo sed -i 's/#PasswordAuthentication.*/PasswordAuthentication no/' /etc/ssh/sshd_config
sudo systemctl restart sshd

# Install fail2ban
sudo apt install -y fail2ban
sudo systemctl enable fail2ban

# Rate limit bot endpoints in Nginx
# Add to server block:
# limit_req_zone $binary_remote_addr zone=botlimit:10m rate=30r/m;

# Restrict Telegram webhook path
# Only allow Telegram IPs (optional, but adds a layer of security)
# Telegram uses IPs from 149.154.160.0/20 and 91.108.4.0/22
Pros and Cons: VPS for Telegram Bots
Advantages
- 24/7 uptime with no sleep mode or spin-down periods
- Flat monthly pricing regardless of message volume
- Host multiple bots on a single server
- Static IP address for reliable webhook configuration
- Full control over runtime, libraries, and configurations
- Can integrate with databases, APIs, and background workers
- Easy to scale by upgrading the VPS plan
- PM2 provides automatic restart, logging, and monitoring
- Lower cost at scale compared to PaaS platforms
Disadvantages
- Requires Linux server administration knowledge
- Must manage SSL certificates and domain configuration
- Responsible for security updates and patches
- No built-in auto-scaling or load balancing
- Single point of failure unless you configure redundancy
- Initial setup takes 20-40 minutes per bot
- No managed database (must install and maintain separately)
Troubleshooting Common Issues
Webhook not working
Verify your Nginx configuration is correct and SSL is active. Test with curl -v https://bots.yourdomain.com/<token>. Check that your bot is listening on the correct port. Ensure your firewall allows inbound traffic on ports 80 and 443. Verify the webhook was set correctly with curl https://api.telegram.org/bot<token>/getWebhookInfo.
Bot responds slowly
Check database query performance with slow query logging. Profile handler functions for bottlenecks. Verify the VPS is not CPU or memory constrained with htop. If the bot makes external API calls, check for network latency. Consider caching frequent API responses with Redis.
PM2 crashes repeatedly
Check error logs with pm2 logs mybot --err. Common causes: out-of-memory errors (increase max_memory_restart), unhandled exceptions in bot code, missing environment variables, or database connection failures. Set max_restarts to prevent infinite restart loops.
Messages arrive out of order
Telegram does not guarantee message delivery order when using webhooks during high traffic. If order matters for your bot's logic, implement a message queue that processes messages sequentially. For most bots, out-of-order delivery is not a significant issue since each message is handled independently.