How to Setup n8n on VPS (2025) — Self-Host Automation Guide
What Is n8n and Why Self-Host It
n8n is a workflow automation platform. For Docker prerequisites, see Docker on Ubuntu VPS, services, and data sources without writing code. Unlike Zapier or Make, n8n runs entirely on your server. For hosting options, see VPS for Docker, which run your automations on their servers and charge per execution, n8n runs entirely on your own infrastructure. This gives you full control over your data. A Netherlands VPS is a great EU location, and the ability to handle sensitive workflows without sending data through third-party servers.
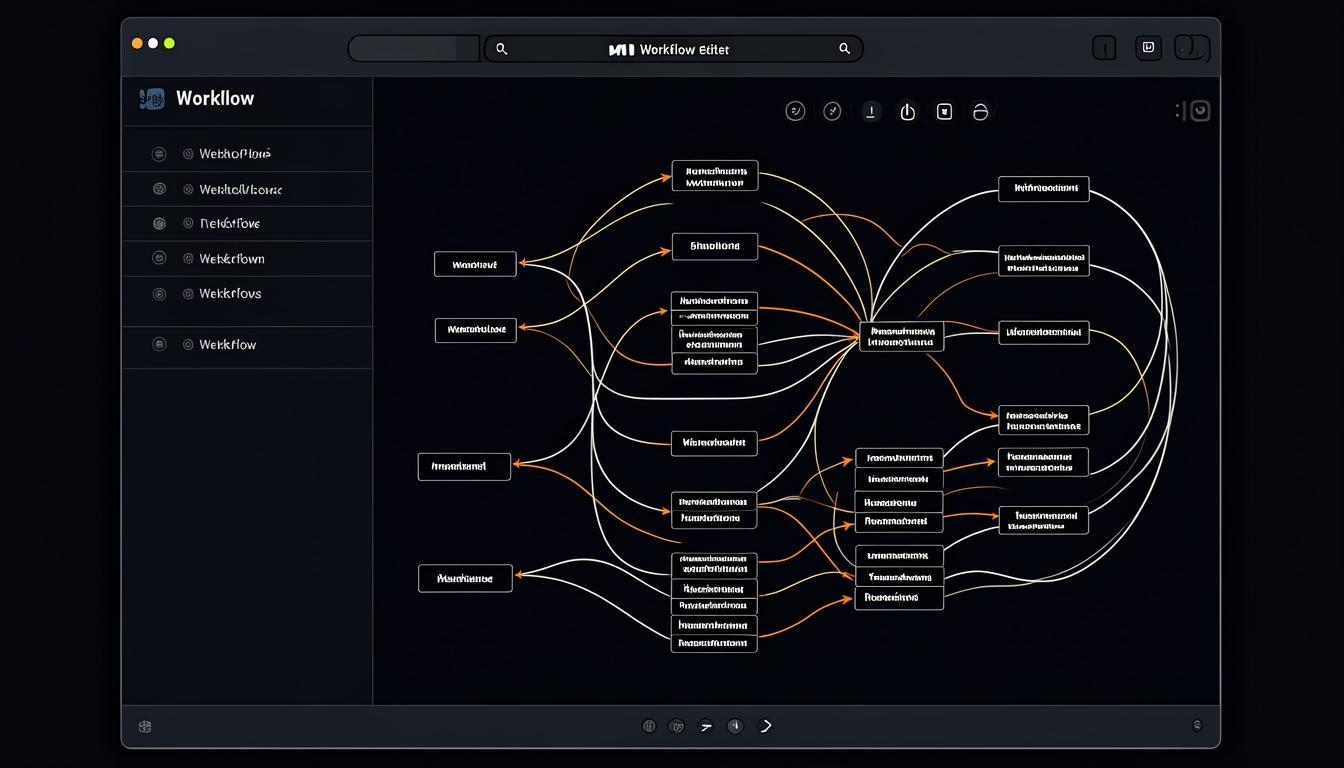
n8n uses a visual node-based editor where each node represents a service, transformation, or logic operation. You connect nodes to build workflows that can automate tasks like: sending notifications when a form is submitted, syncing databases on a schedule, processing webhook payloads, aggregating data from multiple APIs, or orchestrating multi-step approval processes. n8n supports over 400 integrations out of the box and provides a code node for custom JavaScript when pre-built nodes are insufficient.
Self-hosting n8n on a VPS costs a fraction of commercial automation platforms. A modest VPS with 2GB RAM can handle thousands of workflow executions per month. You pay only for the VPS itself, and the number of workflows and executions is unlimited. For teams processing sensitive data (healthcare, finance, legal), self-hosting ensures compliance with data residency requirements that cloud platforms may not satisfy.
The self-hosted version of n8n includes the core functionality: all integrations, the visual editor, webhook endpoints, cron-based scheduling, and error handling. Some advanced features (SSO, LDAP, advanced RBAC) require an n8n enterprise license, but the free version covers the vast majority of use cases.
Prerequisites
| Requirement | Details |
|---|---|
| Operating System | Ubuntu 22.04 LTS or 24.04 LTS |
| RAM | Minimum 2GB (4GB recommended for heavy workloads) |
| Disk Space | Minimum 20GB free (database grows with workflow history) |
| Docker | Docker CE and Docker Compose v2 installed |
| Domain Name | A domain name with an A record pointing to your VPS IP |
| Ports | 80 and 443 open (for HTTP and HTTPS traffic) |
Note: If you have not installed Docker yet, follow our Docker on Ubuntu VPS guide first. This guide assumes Docker and Docker Compose are already working on your system.
Step 1: Create the Project Directory
Create a dedicated directory for your n8n installation. Keeping all configuration files, environment variables, and volume mounts in a single directory simplifies management, backups, and future migrations.
mkdir -p /opt/n8n && cd /opt/n8n
mkdir -p nginx/certbot/conf nginx/certbot/www
Step 2: Create the Docker Compose Configuration
The Docker Compose file defines three services: n8n (the application), PostgreSQL (the database backend), and Nginx (the reverse proxy with SSL termination). Using PostgreSQL instead of the default SQLite backend is strongly recommended for production because PostgreSQL handles concurrent writes better, supports full-text search for workflow history, and scales to larger datasets.
cat > /opt/n8n/docker-compose.yml << 'EOF'
services:
  n8n:
    image: n8nio/n8n:latest
    container_name: n8n
    restart: unless-stopped
    environment:
      - DB_TYPE=postgresdb
      - DB_POSTGRESDB_HOST=postgres
      - DB_POSTGRESDB_PORT=5432
      - DB_POSTGRESDB_DATABASE=n8n
      - DB_POSTGRESDB_USER=n8n
      - DB_POSTGRESDB_PASSWORD=${DB_PASSWORD}
      - N8N_HOST=${DOMAIN}
      - N8N_PORT=5678
      - N8N_PROTOCOL=https
      - WEBHOOK_URL=https://${DOMAIN}/
      - GENERIC_TIMEZONE=${TIMEZONE}
      - TZ=${TIMEZONE}
      - N8N_BASIC_AUTH_ACTIVE=true
      - N8N_BASIC_AUTH_USER=${N8N_USER}
      - N8N_BASIC_AUTH_PASSWORD=${N8N_PASSWORD}
      - EXECUTIONS_DATA_PRUNE=true
      - EXECUTIONS_DATA_MAX_AGE=168
      - N8N_METRICS=true
    volumes:
      - n8n_data:/home/node/.n8n
    depends_on:
      postgres:
        condition: service_healthy
    networks:
      - n8n-network

  postgres:
    image: postgres:16-alpine
    container_name: n8n-postgres
    restart: unless-stopped
    environment:
      - POSTGRES_DB=n8n
      - POSTGRES_USER=n8n
      - POSTGRES_PASSWORD=${DB_PASSWORD}
    volumes:
      - postgres_data:/var/lib/postgresql/data
    healthcheck:
      test: ["CMD-SHELL", "pg_isready -U n8n -d n8n"]
      interval: 5s
      timeout: 5s
      retries: 10
    networks:
      - n8n-network

  nginx:
    image: nginx:alpine
    container_name: n8n-nginx
    restart: unless-stopped
    ports:
      - "80:80"
      - "443:443"
    volumes:
      - ./nginx/nginx.conf:/etc/nginx/conf.d/default.conf:ro
      - ./nginx/certbot/conf:/etc/letsencrypt:ro
      - ./nginx/certbot/www:/var/www/certbot:ro
    depends_on:
      - n8n
    networks:
      - n8n-network

  certbot:
    image: certbot/certbot
    container_name: n8n-certbot
    volumes:
      - ./nginx/certbot/conf:/etc/letsencrypt
      - ./nginx/certbot/www:/var/www/certbot
    entrypoint: "/bin/sh -c 'trap exit TERM; while :; do certbot renew; sleep 12h & wait $${!}; done;'"

volumes:
  n8n_data:
  postgres_data:

networks:
  n8n-network:
    driver: bridge
EOF
Step 3: Create the Environment File
Store sensitive configuration values in a .env file. This file is not committed to version control and keeps passwords separate from the compose configuration. Generate a strong random password for both the database and the n8n login.
cat > /opt/n8n/.env << 'EOF'
DOMAIN=n8n.yourdomain.com
DB_PASSWORD=$(openssl rand -hex 24)
N8N_USER=admin
N8N_PASSWORD=$(openssl rand -hex 16)
TIMEZONE=UTC
EOF
Important: The N8N_PASSWORD and DB_PASSWORD values above use shell command substitution. If you write this file manually (not through the command above), generate the passwords separately with openssl rand -hex 24 and paste the output as literal strings. Write down or securely store the n8n username and password — you will need them to log in.
Secure the environment file so only root can read it:
chmod 600 /opt/n8n/.envStep 4: Create the Nginx Configuration
The Nginx configuration serves two purposes initially: it proxies HTTP requests to the n8n container and provides a challenge path for Let's Encrypt certificate validation. After you obtain the SSL certificate, Nginx handles TLS termination and proxies all traffic to n8n over the internal Docker network.
cat > /opt/n8n/nginx/nginx.conf << 'EOF'
server {
    listen 80;
    server_name n8n.yourdomain.com;

    location /.well-known/acme-challenge/ {
        root /var/www/certbot;
    }

    location / {
        return 301 https://$host$request_uri;
    }
}

server {
    listen 443 ssl;
    server_name n8n.yourdomain.com;

    ssl_certificate /etc/letsencrypt/live/n8n.yourdomain.com/fullchain.pem;
    ssl_certificate_key /etc/letsencrypt/live/n8n.yourdomain.com/privkey.pem;

    ssl_protocols TLSv1.2 TLSv1.3;
    ssl_ciphers ECDHE-ECDSA-AES128-GCM-SHA256:ECDHE-RSA-AES128-GCM-SHA256:ECDHE-ECDSA-AES256-GCM-SHA384:ECDHE-RSA-AES256-GCM-SHA384;
    ssl_prefer_server_ciphers off;

    # HSTS headers
    add_header Strict-Transport-Security "max-age=63072000" always;

    client_max_body_size 100M;

    location / {
        proxy_pass http://n8n:5678;
        proxy_http_version 1.1;
        proxy_set_header Upgrade $http_upgrade;
        proxy_set_header Connection "upgrade";
        proxy_set_header Host $host;
        proxy_set_header X-Real-IP $remote_addr;
        proxy_set_header X-Forwarded-For $proxy_add_x_forwarded_for;
        proxy_set_header X-Forwarded-Proto $scheme;
        proxy_buffering off;
        proxy_cache off;
        chunked_transfer_encoding off;
    }
}
EOF
Replace n8n.yourdomain.com with your actual domain name in both the Nginx configuration and the environment file. The proxy configuration includes WebSocket support (required for n8n's real-time editor), disabled buffering (important for webhook responses), and increased client body size limits (for file uploads in workflows).
Step 5: Obtain an SSL Certificate
Before starting the full stack, you need an SSL certificate. Temporarily start only Nginx with the HTTP-only configuration to complete the Let's Encrypt challenge. First, create a minimal Nginx config that handles only the certificate challenge.
cat > /opt/n8n/nginx/nginx.conf << 'EOF'
server {
    listen 80;
    server_name n8n.yourdomain.com;

    location /.well-known/acme-challenge/ {
        root /var/www/certbot;
    }

    location / {
        return 200 'Waiting for SSL certificate';
        add_header Content-Type text/plain;
    }
}
EOF
Start Nginx temporarily:
cd /opt/n8n
docker compose up -d nginx
Request the SSL certificate. Replace the email address with a real address where Let's Encrypt can send renewal notifications.
docker compose run --rm certbot certonly \
  --webroot \
  --webroot-path /var/www/certbot \
  --email your-email@example.com \
  --agree-tos \
  --no-eff-email \
  -d n8n.yourdomain.com
When the certificate is issued successfully, restore the full Nginx configuration with SSL support:
cat > /opt/n8n/nginx/nginx.conf << 'EOF'
server {
    listen 80;
    server_name n8n.yourdomain.com;

    location /.well-known/acme-challenge/ {
        root /var/www/certbot;
    }

    location / {
        return 301 https://$host$request_uri;
    }
}

server {
    listen 443 ssl;
    server_name n8n.yourdomain.com;

    ssl_certificate /etc/letsencrypt/live/n8n.yourdomain.com/fullchain.pem;
    ssl_certificate_key /etc/letsencrypt/live/n8n.yourdomain.com/privkey.pem;

    ssl_protocols TLSv1.2 TLSv1.3;
    ssl_ciphers ECDHE-ECDSA-AES128-GCM-SHA256:ECDHE-RSA-AES128-GCM-SHA256:ECDHE-ECDSA-AES256-GCM-SHA384:ECDHE-RSA-AES256-GCM-SHA384;
    ssl_prefer_server_ciphers off;

    add_header Strict-Transport-Security "max-age=63072000" always;

    client_max_body_size 100M;

    location / {
        proxy_pass http://n8n:5678;
        proxy_http_version 1.1;
        proxy_set_header Upgrade $http_upgrade;
        proxy_set_header Connection "upgrade";
        proxy_set_header Host $host;
        proxy_set_header X-Real-IP $remote_addr;
        proxy_set_header X-Forwarded-For $proxy_add_x_forwarded_for;
        proxy_set_header X-Forwarded-Proto $scheme;
        proxy_buffering off;
        proxy_cache off;
        chunked_transfer_encoding off;
    }
}
EOF
Restart Nginx to load the updated configuration:
docker compose restart nginxStep 6: Start the Full Stack
With the SSL certificate in place and the Nginx configuration updated, start all services:
cd /opt/n8n
docker compose up -d
Verify all containers are running:
docker compose psAll three services (n8n, postgres, nginx) should show as "running." Check the n8n logs to confirm it started without errors:
docker compose logs -f n8nPress Ctrl+C to exit the log view. Once n8n shows "Editor is now accessible via" in the logs, the application is ready.
Step 7: Access n8n and Create Your First Workflow
Open your browser and navigate to https://n8n.yourdomain.com. Log in with the username and password you set in the .env file.
Creating a Test Workflow
After logging in, click "New Workflow." Create a simple workflow that sends a webhook response to verify everything is working correctly:
1. Click the "+" button to add a node. Search for "Webhook" and add the Webhook trigger node.
2. Set the HTTP Method to "GET" and the path to "/test". Copy the test URL displayed.
3. Click "Listen for Test Event" to activate the webhook.
4. Open a new browser tab and visit the test URL. You should see a JSON response.
5. Back in n8n, the webhook node should show that it received a request.
6. Click "Save" and toggle "Active" to enable the workflow.
The workflow now has a live endpoint at https://n8n.yourdomain.com/webhook/test that any external service can call.
Understanding the Docker Compose Configuration
Database Configuration
The PostgreSQL service uses Alpine Linux for minimal resource usage. The health check (pg_isready) ensures that n8n waits for the database to be fully initialized before attempting to connect. Without this health check, n8n might start before PostgreSQL accepts connections and crash on startup.
Execution Data Pruning
The environment variable EXECUTIONS_DATA_PRUNE=true combined with EXECUTIONS_DATA_MAX_AGE=168 automatically deletes execution data older than 7 days (168 hours). This prevents the database from growing indefinitely. Workflow execution history is useful for debugging, but keeping years of data consumes disk space and slows down queries. Adjust the max age based on your debugging needs — 168 hours (7 days) is a good balance for most setups.
Webhook URL Configuration
The WEBHOOK_URL environment variable tells n8n what base URL to use when generating webhook URLs. This must match your public-facing domain with HTTPS. If this is misconfigured, webhook URLs in n8n's interface will be incorrect, and external services will not be able to reach your webhook endpoints.
Setting Up Automated Backups
Backups are critical for any production n8n instance. Your workflows represent hours of work, and the database contains credentials and configuration that would be tedious to recreate. Set up a backup script that dumps the PostgreSQL database and copies the n8n data volume.
cat > /opt/n8n/backup.sh << 'SCRIPT'
#!/bin/bash
BACKUP_DIR="/opt/n8n/backups"
DATE=$(date +%Y%m%d_%H%M%S)
mkdir -p $BACKUP_DIR

# Dump PostgreSQL database
docker compose exec -T postgres pg_dump -U n8n n8n | gzip > $BACKUP_DIR/n8n_db_$DATE.sql.gz

# Backup n8n data directory
tar czf $BACKUP_DIR/n8n_data_$DATE.tar.gz -C /var/lib/docker/volumes n8n_n8n_data/

# Keep only the last 14 days of backups
find $BACKUP_DIR -name "*.gz" -mtime +14 -delete

echo "Backup completed: $DATE"
SCRIPT
chmod +x /opt/n8n/backup.sh
Add a daily cron job to run the backup at 2:00 AM:
echo "0 2 * * * /opt/n8n/backup.sh >> /var/log/n8n-backup.log 2>&1" | crontab -Restoring from Backup
To restore a database backup, stop the n8n service, restore the SQL dump, and restart:
cd /opt/n8n
docker compose stop n8n
gunzip -c /opt/n8n/backups/n8n_db_YYYYMMDD.sql.gz | docker compose exec -T postgres psql -U n8n n8n
docker compose start n8n
Updating n8n
Docker makes updating n8n straightforward. Pull the latest image and restart the containers. Because n8n data is stored in named Docker volumes, your workflows and configuration persist across updates.
cd /opt/n8n
docker compose pull
docker compose up -d
Before updating, check the n8n release notes at github.com/n8n-io/n8n/releases for any breaking changes or migration steps. Most updates are seamless, but major version bumps occasionally require database migrations that n8n handles automatically on startup.
If an update causes issues, roll back to the previous version by specifying the image tag in docker-compose.yml:
# In the n8n service definition, change:
image: n8nio/n8n:latest
# To a specific version:
image: n8nio/n8n:1.70.3
Then restart with docker compose up -d.
Production Security Hardening
Firewall Configuration
Restrict access to only the ports that n8n needs. All traffic should go through Nginx on ports 80 and 443. The n8n application port (5678) should never be exposed to the internet directly.
ufw default deny incoming
ufw default allow outgoing
ufw allow 22/tcp    # SSH
ufw allow 80/tcp    # HTTP
ufw allow 443/tcp   # HTTPS
ufw enable
Rate Limiting
Add rate limiting in Nginx to protect against brute force attacks on the n8n login page and abuse of webhook endpoints.
# Add this to the http block in nginx.conf
limit_req_zone $binary_remote_addr zone=n8n:10m rate=10r/s;

# Add this inside the location / block
limit_req zone=n8n burst=20 nodelay;
Fail2Ban Integration
Install Fail2Ban to automatically block IP addresses that show malicious signs, such as too many failed login attempts.
apt install fail2ban -y
cat > /etc/fail2ban/jail.local << 'EOF'
[n8n-auth]
enabled = true
port = 80,443
filter = n8n-auth
logpath = /opt/n8n/nginx/logs/access.log
maxretry = 5
bantime = 3600
EOF
Monitoring n8n
Monitor your n8n instance to catch issues before they affect your automations. Docker provides built-in metrics, and n8n exposes a metrics endpoint.
Docker Container Monitoring
# Check resource usage
docker stats n8n n8n-postgres n8n-nginx

# View recent logs
docker compose logs --tail 100 n8n

# Check if services are running
docker compose ps
Health Check Endpoint
n8n provides a health check endpoint at /healthz. Set up an external monitoring service (UptimeRobot, BetterUptime, or your own script) to poll this endpoint and alert you if n8n becomes unresponsive.
# Test the health endpoint
curl -s https://n8n.yourdomain.com/healthz
A healthy response returns {"status": "ok"}.
Setting Up Uptime Monitoring
Create a simple monitoring script that checks the health endpoint and restarts n8n if it becomes unresponsive:
cat > /opt/n8n/healthcheck.sh << 'SCRIPT'
#!/bin/bash
RESPONSE=$(curl -s -o /dev/null -w "%{http_code}" https://n8n.yourdomain.com/healthz)
if [ "$RESPONSE" != "200" ]; then
    echo "$(date): n8n unhealthy (HTTP $RESPONSE), restarting..." >> /var/log/n8n-healthcheck.log
    cd /opt/n8n && docker compose restart n8n
else
    echo "$(date): n8n healthy" >> /var/log/n8n-healthcheck.log
fi
SCRIPT
chmod +x /opt/n8n/healthcheck.sh
Run the health check every 5 minutes:
echo "*/5 * * * * /opt/n8n/healthcheck.sh" | crontab -Environment Variable Reference
These are the most commonly used n8n environment variables for production deployments:
| Variable | Description | Default |
|---|---|---|
N8N_HOST | Public hostname for n8n | localhost |
N8N_PORT | Internal port n8n listens on | 5678 |
N8N_PROTOCOL | http or https | http |
WEBHOOK_URL | Base URL for webhook endpoints | — |
DB_TYPE | Database type (sqlite or postgresdb) | sqlite |
DB_POSTGRESDB_HOST | PostgreSQL hostname | localhost |
DB_POSTGRESDB_DATABASE | PostgreSQL database name | n8n |
EXECUTIONS_DATA_PRUNE | Enable automatic data pruning | true |
EXECUTIONS_DATA_MAX_AGE | Max age for execution data (hours) | 336 |
GENERIC_TIMEZONE | Timezone for cron schedules | — |
N8N_BASIC_AUTH_ACTIVE | Enable basic authentication | true |
N8N_METRICS | Enable Prometheus metrics endpoint | false |
N8N_PAYLOAD_SIZE_MAX | Max payload size in MB | 16 |
Troubleshooting Common Issues
1. n8n Container Keeps Restarting
Symptom: docker compose ps shows the n8n container repeatedly restarting.
Solution: Check the logs with docker compose logs --tail 50 n8n. The most common cause is a database connection failure. Verify that the PostgreSQL container is healthy (docker compose ps postgres) and that the DB_PASSWORD in the .env file matches what PostgreSQL expects. Also check that the database health check has passed — n8n will not start until PostgreSQL is ready to accept connections.
2. SSL Certificate Errors
Symptom: Browser shows a certificate error or Nginx fails to start with "cannot load certificate."
Solution: Verify the certificate files exist at the expected path inside the container. The Certbot volume mounts ./nginx/certbot/conf to /etc/letsencrypt. Check that the certificate files are present:
ls -la /opt/n8n/nginx/certbot/conf/live/n8n.yourdomain.com/If the files are missing, re-run the Certbot command from Step 5. If the certificate has expired, Certbot's auto-renewal should handle it — check the renewal logs with docker compose logs certbot.
3. Webhooks Not Reaching n8n
Symptom: External services calling your webhook URLs receive timeout errors.
Solution: Verify the WEBHOOK_URL environment variable is set to https://n8n.yourdomain.com/ (with trailing slash). Check that the workflow containing the webhook is active (toggled on). Ensure your firewall allows traffic on ports 80 and 443. Check Nginx logs for proxy errors:
docker compose logs nginx --tail 504. Database Growing Too Large
Symptom: Disk space usage increases steadily over time.
Solution: Verify that execution data pruning is enabled. Check the actual database size:
docker compose exec postgres psql -U n8n -c "SELECT pg_size_pretty(pg_database_size('n8n'));"Reduce EXECUTIONS_DATA_MAX_AGE if you do not need long execution history. You can also manually prune old data directly in the database, though this is rarely necessary if the automatic pruning is working.
5. Timezone Issues with Scheduled Workflows
Symptom: Cron-based workflows trigger at the wrong times.
Solution: Set the GENERIC_TIMEZONE and TZ environment variables to your local timezone (e.g., America/New_York, Europe/London). Use the timezone identifier format, not an abbreviation. Verify the container timezone:
docker compose exec n8n dateFrequently Asked Questions
Is the self-hosted version of n8n free?
Yes. n8n is source-available under the Sustainable Use License. You can use it for free for internal and personal projects. Commercial use by companies with more than a certain revenue threshold requires a license. Check n8n's current licensing terms for the specific thresholds.
Can I run n8n without Docker?
Yes. n8n can be installed directly with Node.js. However, Docker is the recommended approach because it isolates dependencies, simplifies updates, and makes the configuration (PostgreSQL, Nginx, SSL) reproducible. Manual installation requires managing Node.js versions, PostgreSQL separately, and a process manager like PM2.
How many workflows can n8n handle on a small VPS?
On a 2GB RAM VPS, n8n can comfortably handle 50-100 active workflows with moderate execution frequency. The limiting factor is typically RAM during concurrent executions. If your workflows involve large data processing or file handling, you may need 4GB or more.
How do I enable email notifications for failed executions?
Set the N8N_EMAIL and N8N_EMAIL_MODE environment variables in your docker-compose.yml. n8n supports SMTP for sending notifications. You need an SMTP server (your own, or a service like SendGrid, Mailgun, or AWS SES) configured with the appropriate credentials.
Can I use n8n with multiple users?
The free self-hosted version supports a single user. Multi-user support with role-based access control (RBAC) is an enterprise feature. For team collaboration, each team member typically shares the same login or uses the enterprise edition.
Does n8n support HTTPS webhooks?
Yes. When you configure N8N_PROTOCOL=https and set up an SSL certificate (as described in this guide), all webhook URLs use HTTPS automatically. The WEBHOOK_URL environment variable controls the base URL that n8n uses when generating webhook endpoints.
How do I migrate n8n to a new VPS?
Back up the Docker volumes (both n8n_data and postgres_data), the .env file, and the docker-compose.yml. On the new VPS, install Docker, copy all files to the same directory structure, and run docker compose up -d. The PostgreSQL health check ensures n8n waits for the database before starting.
What happens when n8n restarts — do active workflows resume?
n8n recovers in-flight executions after a restart for most node types. Workflows that were in the middle of processing will retry or resume depending on the node type. Long-polling webhooks and cron triggers restart automatically. However, it is best practice to design critical workflows with idempotency so that partial executions can be safely retried.